Pages

Wednesday, October 27, 2010

Error enabling VMware vCenter Update Manager 4.1 Plug-in: “… Database temporarily unavailable or has network problems.”

While this error could be caused by various reasons, the following is one of the causes and resolution to the problem.

Problem

After installing VMware vCenter Update Manager 4.1 as per the deployment guide, you proceed to enable the plug-in within VI Client’s Plug-in Manager. However, once you right click on the plug-in and choose enable, you receive the following error message:

There was an error connecting to VMware vCenter Update Manager - [vCenterNameOrIP.domain.com:443].

Database temporarily unavailable or has network problems.

image

Cause

This can be caused if you meet the following 3 criteria:

1. You are not using a local SQL Express database for Update Manager.

2. You’ve configured your 32-bit ODBC DSN with Integrated Windows Authentication during the Microsoft SQL Server DSN Configuration window where you are asked How should SQL Server verify the authenticity of the login ID.

image

image

image

image

3. You have just finished installing VMware vCenter Update Manager and have not modified the log on properties of the VMware vCenter Update Manager Service in the services console.

image

The reason why this error is thrown when you enable the plug-in is because VMware vCenter Update Manager is by default installed and ran under the Local System account and therefore when you try to enable the plug-in and Update Manager makes an attempt to connect to the remote database with the 32-bit ODBC DSN with Integrated Authentication, the remote SQL database will reject the connection because Local System does not have permissions to the database. This wouldn’t be a problem if you were using a local SQL Express database because Local System has full permissions to a local SQL Express database.

Solution

To rectify this, all you need to do is change the Log on as properties of the service to the proper service account you want to use to access the database. Since Integrated Windows Authentication is going to be used, this account will be a domain account.

image

image

Once you’ve completed the change, make sure you restart the service so it will be ran as the service account.

image

image

Once you’ve made the changes and restarted the service, you should now be able to enable the plug-in within the Plug-in Manager.

image

Friday, October 22, 2010

VMware vCenter 4.0 / 4.1 ODBC DSN database connection – Why am I missing the SQL Server Native Client 10.0 option?

I apologize for forgetting that there’s a small difference when creating an ODBC DSN database connection on the vCenter server when SQL Server 2000 / 2005 / 2008 is not installed locally so this post serves to show how to create the ODBC DSN database connection in this situation. So if you’ve read my post here: http://terenceluk.blogspot.com/2010/10/creating-vcenter-41-sql-database-and.html and find that you’re missing the SQL Server Native Client 10.0 option, please read on.

By default, when you install a fresh copy of Windows Server 2008 R2 64-bit and navigate to Start –> Administrative Tools –> Data Sources (ODBC) –> System DSN –> Add, you’ll only see the following driver:

Name: SQL Server

Version: 6.01.7600.16385

Company: Microsoft Corporation

File: SQLSRV32.DLL

Date: 7/13/2009

image

This is because the operating system is only shipped with this driver and this is not what VMware’s vCenter 4.0 or 4.1 requires you to use.

The proper one is actually the following:

Name: SQL Server Native Client 10.0

Version: The version varies but any of the following should work –> 2007.100.2531.00 or 2007.100.1600.22

Company: Microsoft Corporation

File: SQLNCLI10.DLL

Date: Date will varies but version 2007.100.2531.00 is 3/30/2009

image

So how do I get this option? The binaries to get this driver is actually found on the Microsoft site and based on the searches I’ve done, I was able to find 4:

Microsoft SQL Server 2008 Feature Pack, August 2008

http://www.microsoft.com/downloads/en/details.aspx?FamilyID=c6c3e9ef-ba29-4a43-8d69-a2bed18fe73c

Microsoft SQL Server 2008 Feature Pack, October 2008

http://www.microsoft.com/downloads/en/details.aspx?FamilyID=228de03f-3b5a-428a-923f-58a033d316e1

Microsoft SQL Server 2008 Feature Pack, April 2009

http://www.microsoft.com/downloads/en/details.aspx?FamilyID=b33d2c78-1059-4ce2-b80d-2343c099bcb4

Microsoft SQL Server 2008 Service Pack 2 Feature Pack

http://www.microsoft.com/downloads/en/details.aspx?FamilyID=1b2bd555-cb5b-47b9-88c7-3f89f3b43779

Microsoft® SQL Server® 2008 R2 Feature Pack

http://www.microsoft.com/downloads/en/details.aspx?FamilyID=ceb4346f-657f-4d28-83f5-aae0c5c83d52

Here’s a link of the search results for “sql server feature pack 2008” on support.microsoft.com:

http://www.microsoft.com/downloads/en/results.aspx?freetext=sql+server+feature+pack+2008&displaylang=en&stype=s_basic

image

So what have I noticed while trying out those feature packs?

Microsoft SQL Server 2008 Feature Pack, August 2008 – SQL Server Native Client 10.0 version:

Programs and Features version: 10.0.1600.22

image

New Data Source version: 2007.100.1600.22

image

--------------------------------------------------------------------------------------------------------------------------------------------------------------------

Microsoft SQL Server 2008 Feature Pack, October 2008 – SQL Server Native Client 10.0 version:

Programs and Features version: 10.0.1600.22 (same as August 2008)

New Data Source version: 2007.100.1600.22 (same as August 2008)

--------------------------------------------------------------------------------------------------------------------------------------------------------------------

Microsoft SQL Server 2008 Feature Pack, April 2009 – SQL Server Native Client 10.0 version:

Programs and Features version: 10.1.2531.0

image

New Data Source version: 2007.100.2531.00

image

--------------------------------------------------------------------------------------------------------------------------------------------------------------------

Microsoft SQL Server 2008 Service Pack 2 Feature Pack – SQL Server Native Client 10.0 version:

Programs and Features version: 10.2.4000.0

image

New Data Source version: 2007.100.4000.00

image

--------------------------------------------------------------------------------------------------------------------------------------------------------------------

Microsoft® SQL Server® 2008 R2 Feature Pack – SQL Server Native Client 10.0 version:

Programs and Features version: 10.50.1600.1

image

New Data Source version: 2007.100.4000.00

image

--------------------------------------------------------------------------------------------------------------------------------------------------------------------

So now you’re wondering, great, there are all these versions so which one am I supposed to use? Unfortunately, I haven’t had the chance to test all of these but the following list includes my comments as to whether I have or haven’t used them before:

Microsoft SQL Server 2008 Feature Pack, August 2008 – SQL Server Native Client 10.0 version:

Programs and Features version: 10.0.1600.22

New Data Source version: 2007.100.1600.22

Works with vCenter 4.0 as a 32-bit ODBC.

--------------------------------------------------------------------------------------------------------------------------------------------------------------------

Microsoft SQL Server 2008 Feature Pack, October 2008 – SQL Server Native Client 10.0 version:

Programs and Features version: 10.0.1600.22 (same as August 2008)

New Data Source version: 2007.100.1600.22 (same as August 2008)

Works with vCenter 4.0 as a 32-bit ODBC.

--------------------------------------------------------------------------------------------------------------------------------------------------------------------

Microsoft SQL Server 2008 Feature Pack, April 2009 – SQL Server Native Client 10.0 version:

Programs and Features version: 10.1.2531.0

New Data Source version: 2007.100.2531.00

Works with vCenter 4.1 as a 64-bit ODBC with SQL Server 2008 locally installed.

--------------------------------------------------------------------------------------------------------------------------------------------------------------------

Microsoft SQL Server 2008 Service Pack 2 Feature Pack – SQL Server Native Client 10.0 version:

Programs and Features version: 10.2.4000.0

New Data Source version: 2007.100.4000.00

Never tested with vCenter 4.0 or 4.1.

--------------------------------------------------------------------------------------------------------------------------------------------------------------------

Microsoft® SQL Server® 2008 R2 Feature Pack – SQL Server Native Client 10.0 version:

Programs and Features version: 10.50.1600.1

New Data Source version: 2007.100.4000.00

Never tested with vCenter 4.0 or 4.1.

--------------------------------------------------------------------------------------------------------------------------------------------------------------------

So if you’re wondering what you should be using if you’re installing vSphere 4.1 with a SQL Server 2008 server, I can guarantee that you can use the 64-bit ODBC driver:

Microsoft SQL Server 2008 Feature Pack, April 2009

Which can be downloaded here: http://www.microsoft.com/downloads/en/details.aspx?FamilyID=b33d2c78-1059-4ce2-b80d-2343c099bcb4

If you’re installing vSphere 4.0 with a SQL Server 2008 server, I can guarantee that you can use the 32-bit ODBC driver:

Microsoft SQL Server 2008 Feature Pack, August 2008

Which can be downloaded here: http://www.microsoft.com/downloads/en/details.aspx?FamilyID=c6c3e9ef-ba29-4a43-8d69-a2bed18fe73c

OR

Microsoft SQL Server 2008 Feature Pack, October 2008

Which can be downloaded here: http://www.microsoft.com/downloads/en/details.aspx?FamilyID=228de03f-3b5a-428a-923f-58a033d316e1

Note that August 2008 and October 2008 has the same Microsoft® SQL Server® 2008 Native Client.

--------------------------------------------------------------------------------------------------------------------------------------------------------------------

I believe an example of the download and install process would help so the following lists the steps for installing the Microsoft® SQL Server® 2008 Native Client for vCenter 4.1:

Navigate to http://www.microsoft.com/downloads/en/details.aspx?FamilyID=b33d2c78-1059-4ce2-b80d-2343c099bcb4 and search for Microsoft SQL Server 2008 Native Client:

image

Download the X64 Package (sqlncli.msi):

image

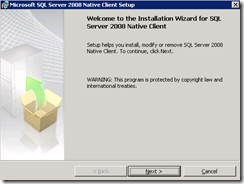
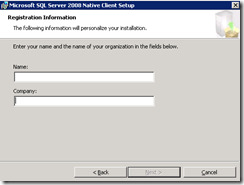
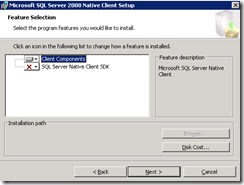
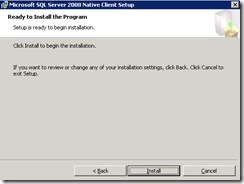
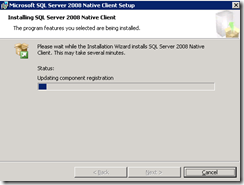
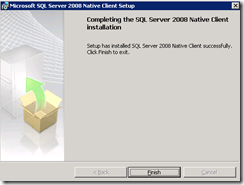
Once you’ve downloaded the file, continue to install the sqlncli.msi driver:

image

image

image

image

image

image

image

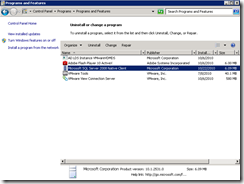
Once completed, you can double check the version in the Programs and Features:

image

Navigate to Start –> Administrative Tools –> Data Sources (ODBC) –> System DSN –> Add, you’ll see the following driver:

image

Choose the SQL Server Native Client 10.0 and create the ODBC DSN. For detail steps on configuring the ODBC DSN, please see my previous post:

Creating vCenter 4.1 SQL database and ODBC DSN Connection

http://terenceluk.blogspot.com/2010/10/creating-vcenter-41-sql-database-and.html

I hope this helps clarify the confusion on why the SQL Server Native Client 10.0 would be missing from the drivers.

Thursday, October 21, 2010

Installing VMware View 4.5 – Composer Server 2.5 and Connection & Transfer Server 4.5

As usual, I always document my installs whether it’s to share with other colleagues if they ever had to do an install themselves or have something to refer to if anyone ever asks me the parameters I used to set up an environment so this blog post serves to show anyone out there interested in seeing the process of installing VMware View 4.5. Before I proceed, I would like to note that this is a purely a “Let’s get View 4.5 deployed to see what it looks like” install so I will not be including any best practices related to sizing and configuration information.

Preparation

Virtual Machine Servers: 3 x Windows Server 2008 64-bit Servers

  1. Server1 – vCenter, View Composer
  2. Server2 – View Connection Server
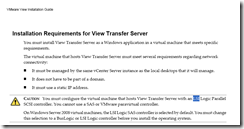
  3. Server3 – View Transfer Server (Make sure you create this virtual machine with LSI Logic Parallel SCSI controller).

Service accounts:

  1. vCenter domain service account
  2. View Composer 2.5 database access domain service account
  3. View Events SQL Authentication service account

Setting up the View Composer 2.5 database and ODBC connection

Creating the VMware View Composer 2.5 database was a lot easier than the vCenter database as shown in one of my previous posts (http://terenceluk.blogspot.com/2010/10/creating-vcenter-41-sql-database-and.html). All you really have to do is the following:

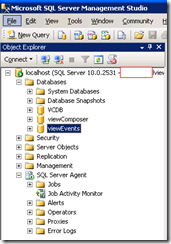
Fire up Microsoft SQL Server Management Studio, connect to the SQL database server you’ll be using to host the View Composer database, right click on Databases, choose New Database, fill in the appropriate fields modifying any settings you would like and click OK:

image

image

Once the View Composer database has been set up, log onto the server the server you’ll be installing View Composer (in this case, it’ll be your vCenter) and proceed to creating a System DSN for the database making sure you choose the SQL Server Native Client 10.0 and not the SQL Server driver:

image

image

I choose to use the same SQL server that is being used for vCenter and since it’s installed on the vCenter virtual machine, you can see that demovc01.someDomain.com was used in the Server field.

image

As stated in my previous post about setting up the ODBC connection for vCenter, I always prefer to use integrated authentication for the ODBC connection so here you’ll see I did not specify a user account and password because I anticipate the account that uses this ODBC connection has permissions to the database.

Also, you might wonder why I never specified any instructions on setting the View Composer database permissions earlier and the reason for that is because the service account that we will use is a local administrator on the server and therefore is also a sysadmin which has full permissions for the SQL database.

image

Continue and change the default database to the View Composer database:

image

Leave the following settings as the default:

image

Test connection to make sure it completes successfully. Remember that when you hit the test button, it’s going to use the account you’re logged in to test so if you’re not logged in with an account that has permissions, the test will fail.

image

Once completed, you’ll see a new entry in your ODBC Data Source window:

image

Installing VMware View Composer 2.5

Once you have the View Composer 2.5 database and ODBC connection set up, log onto vCenter and navigate to where you have the installation binaries stored.

image

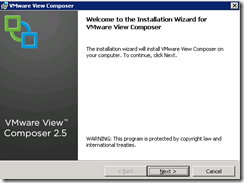
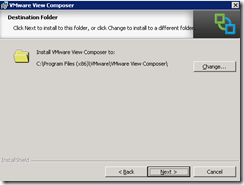
Execute the installation binaries to begin the install:

image

image

image

image

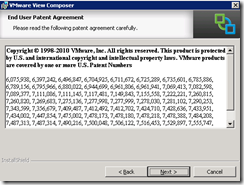
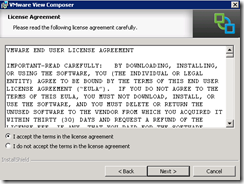
Accept the EULA like we always do:
image

image

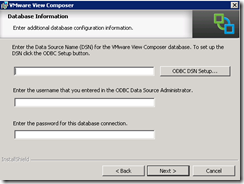
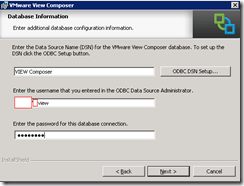
What I found interesting was that the Database Information window was different than vCenter’s and for this install, you were required to enter the DSN name along with the user name and credentials. Proceed with doing so and hit next.
image

image

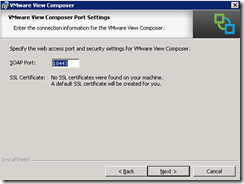
Unless you require the SOAP port number to be changed, leave it as the default:
image

Interesting to note that View Composer 2.5 is seemingly a 32-bit application at this point.
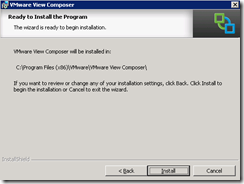
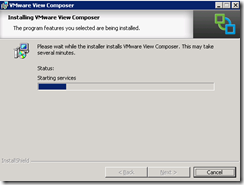
image

image

image

image

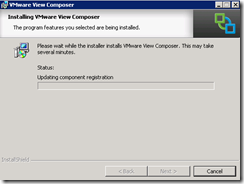
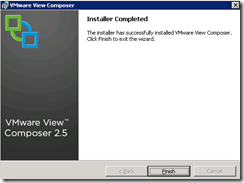
Once the installer completes, the VMware View Composer role is now on your vCenter server. Nothing to it right?

Installing VMware View Connection Server 4.5

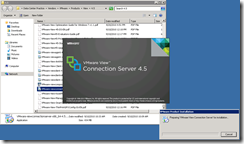
Log onto the newly created Windows Server 2008 R2 64-bit virtual machine you have created for the View Connection server and navigate to the View Connection 4.5 server’s binaries:
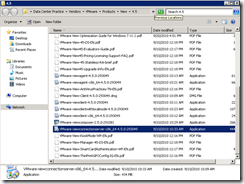
image

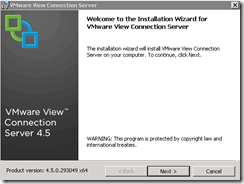
Begin the installation:

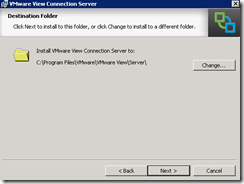
image

image

image

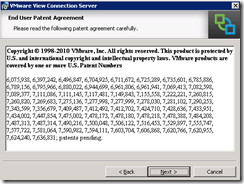
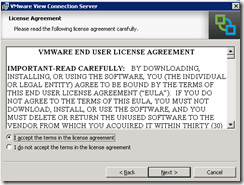
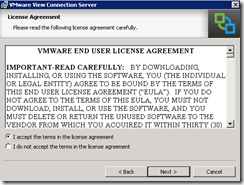
Accept the EULA as usual:

image

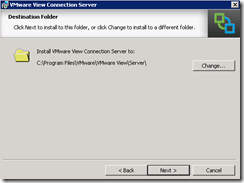
image

I won’t go into the details of the listed options as they can be found in the deployment guide so proceed with choosing the View Standard Server:
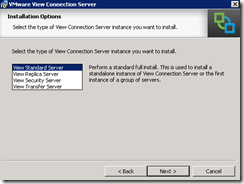
image

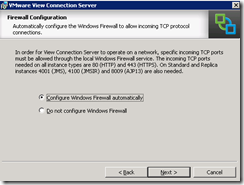
In this window, you’ll be able to choose whether you want the firewall automatically configured or not:
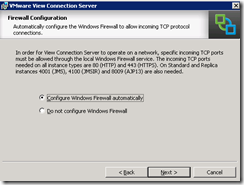
image

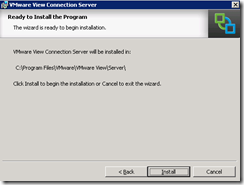
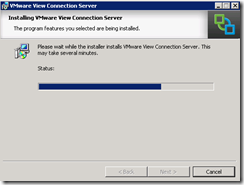
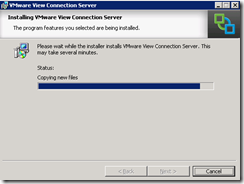
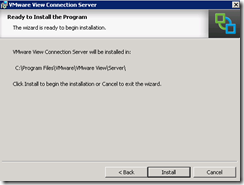
Now you’re ready to install:

image

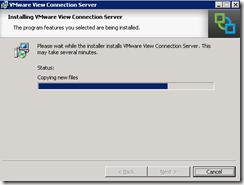
image

image

I was able to capture this status during the install which shows that an additional Windows role (AD LDS) was automatically installed:
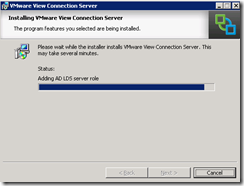
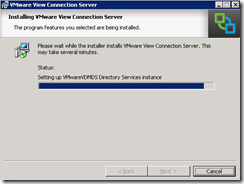
image

image

This status of loading the directory schema reminded me of the days when I had to set up Microsoft’s ADAM for a power plant project.
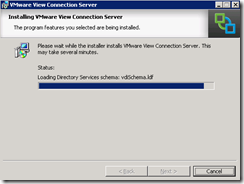
image

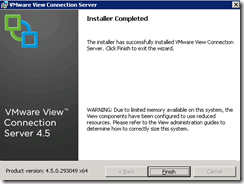
Once the installation wizard is complete, click Finish.
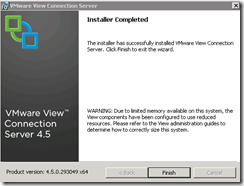
image

One of the things I always like to check on after an install are the services and as shown in the screenshot below, the services have been successfully installed and started:

image

Here’s a snippet of the the services being listed in the deployment guide:
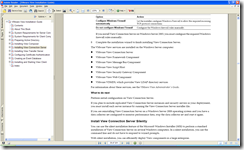
image

Once the installation is complete, open up the View Administrator console and add the vCenter server into the settings as shown in the following screenshot:
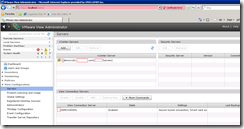
image

Installing VMware Transfer Server 4.5

To install the VMware View Transfer Server 4.5, log onto the newly created Windows Server 2008 R2 64-bit virtual machine you have created for the Transfer server and navigate to the View Connection 4.5 server’s binaries:
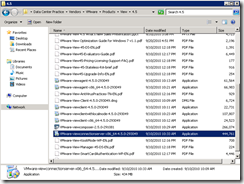
image

Execute the binaries to start the install:
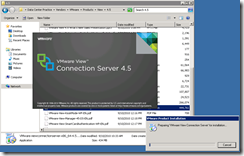
image

Proceed with going through the wizard where you’ll remember seeing while installing the Connection Server:
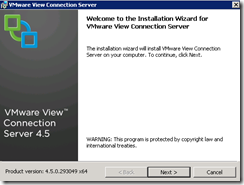
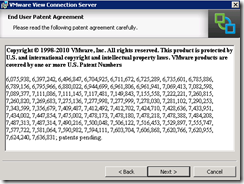
image

image

image

image

Make sure you choose the View Transfer Server option:
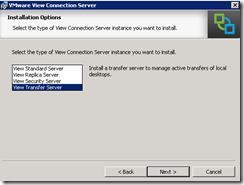
image

Now if you did not follow the instructions I noted earlier in this blog post or the post I wrote a few weeks ago (http://terenceluk.blogspot.com/2010/10/gotcha-vmware-view-transfer-servers.html) and deployed this virtual machine with a LSI SAS SCSI adapter, the following screen is what you’ll be presented with:
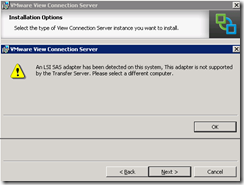
image

Here’s the screenshot from the deployment guide:
image

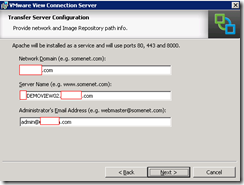
If you deployed this virtual machine with the proper LSI Logic Parallel SCSI controller then you’ll be able to proceed:
image

Continue with the wizard:

image

image

image

image

As I mentioned earlier, we can review the services console to determine whether the service has been installed and started:

image

Other than the SCSI controller requirements, there really isn’t much to it.

Initial Configuration of VMware View Transfer Server 4.5

One of the first things you’ll need to do as per the deployment guide is to add the vCenter server that contains the Transfer Server in the View Administrator console so log into the View Connection server (also your vCenter) and fire up the console navigating to View Configuration –> Servers.
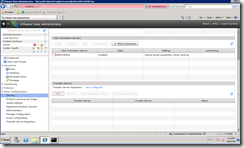
image

Choose the vCenter server containing the Transfer Server:
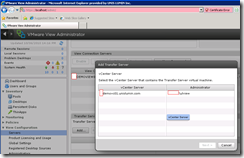
image

Then select the Transfer Server virtual machine:
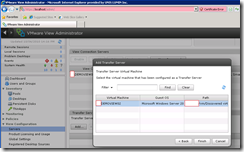
image

Once you click Finish, you’ll see the transfer server at the bottom of the window:
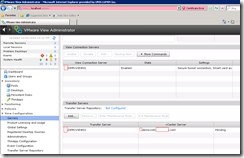
image

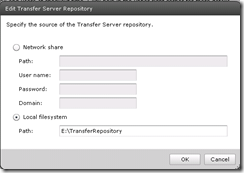
Once the Transfer Server has been added, click on the Not Configured link beside the Transfer Server Repository: Not Configured heading.
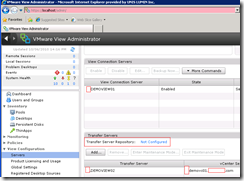
image

Once you’ve clicked on the link, you will be presented with the following window:
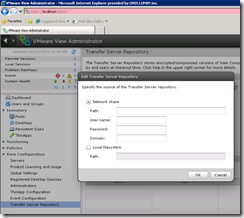
image

This is actually where I got confused as I wanted to use a local drive and not a network share. Is this repository going to be located on the Connection Server or the Transfer Server? As it turns out, if you’re using a local drive, it would be stored on the Transfer Server which means, and this is going to be confusing, you’re specifying a local drive on the Transfer Server while configuring it on the Connection Server.

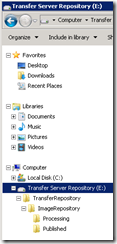
I simply chose to add an additional hard disk to the Transfer Server’s virtual machine and gave it the letter E. This folder will automatically get created on the drive:
image

Here’s a screenshot of the folder that was created on the Transfer Server:
image

Note the additional subfolders created.

Add a Database and Database User for View Events

Every time I read this heading confuses me but this is basically what the deployment guide has for the heading of creating a database to log events.
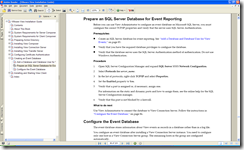
image

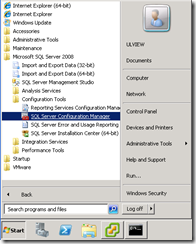
Prior to configuring the database, we’ll need to make sure the appropriate protocols are set up for View to forward events over so open up the SQL Server Configuration Manager on the SQL server that will be hosting the database:
image

As stated in the deployment guide, make sure TCP/IP is enabled under SQL Server Network Configuration:
image

image

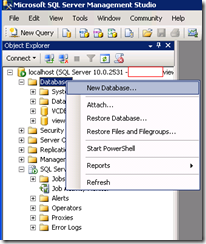
Open up Microsoft SQL Server Management Studio, right click on Databases, and select New Database:
image

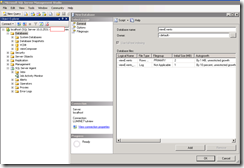
Configure the appropriate settings for the database:
image

image

Note: I didn’t bother creating an additional account for View to access this database because I figure I could use the domain account I used for View Composer but as it turns out, you can’t because the account required while configuring the Event Database has to be a SQL Server Authentication account. Best practice is to to create a separate account that only has privileges to this database.

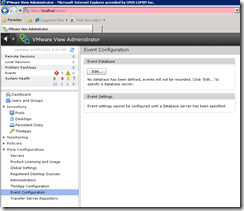
Once you’ve successfully created the database, open up the View Administrator console, navigate to View Configuration –> Event Configuration and choose Edit under Event Database:
image

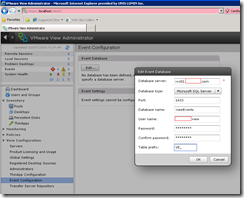
As noted above, I thought I would be able to use the domain account so I went ahead and entered the credentials as shown in the following window:
image

Once I clicked OK, I got the following error:

An error occurred while attempting to configure the database. Double check the database parameters and ensure that the database is not down, restarting, or otherwise unavailable.

image

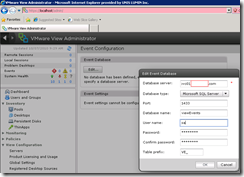
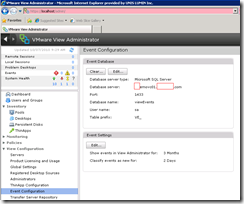
Since I suspected that it’s probably asking for a SQL Server Authentication account, I went ahead to use the SA account and this time it worked. Note that this is terrible practice and should not be followed for your production environment:
image

image

So here we have it. View 4.5 has been installed with the initial configuring completed. You can proceed with deploying a desktop virtual machine to use for your virtual desktop deployments.

If you encounter the issue where you’re presented with the following error after provisioning a desktop:

This desktop currently has no desktop sources available. Please try connecting to this desktop again later, or contact your system administrator.

… please see one of my previous blog posts about it here: http://terenceluk.blogspot.com/2010/10/vmware-view-45-client-error-this.html